
We are so thrilled to have Megan from Miss Madison's Charmed Life over to guest post today. When I first saw Megan's amazing headboard, I knew I wanted her to share it with our readers and then maybe you will pin it, tweet it, and share it because this headboard is absolutely pin, tweet, and share worthy!
So without further ado...


So without further ado...
I'm super excited to be sharing my Rhinestone Tufted Headboard with Our DIY Diaries today!! Tackling this project has been on my to do list for a while and I was SO relieved that it turned out as good as I had imagined, doesn't always happen that way :)
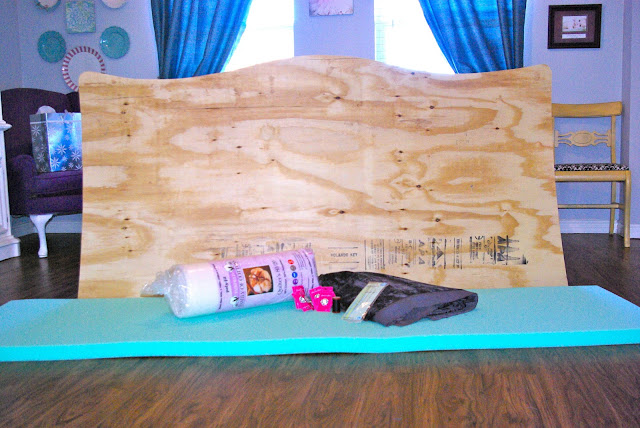
Here are the cast of characters {as Pioneer Women would say}

1/2 inch plywood {4x8 sheet from Lowe's}
2 inch foam {EXPENSIVE take a coupon!}
3 yards of fabric {heavy upholstery fabric works best}
buttons {I opted for Rhinestone buttons}
Long upholstery needle and thread
batting
I figured out the dimensions and had my handy neighbor cut out the shape for me. I have a king size mattress which is 76 inches wide, I added an inch to each side so once the bed was made up it wouldn't look too narrow. The height is a personal preference, I wanted mine to be large and in charge so I went with 68 inches tall {28 inches were the legs which you will see below and 40 was the large wood piece}.

Mark where you want your tufts, wish I could give you a good way to do it, but every headboard is different and you just have to eyeball and measure until you want to scream :) Then drill holes {I used a 5\32 drill bit}

I decided to add legs, they aren't for support but just to make the fabric go to the floor I think it looks more professional, I used some flat brackets and tiny screw to attach them.

Next lay the wood on the foam and cut out your shape. I used a utility knife, but I would recommend buying\borrowing a electric knife it will cut more smoothly.

Spray Adhesive! Some say this step is not necessary, but after all this work better safe than sorry. I wanted to make sure my foam didn't move while stapling on my batting or fabric.

Use that stuff outdoors and with a mask it's super toxic :)

Wrap and staple your batting.

Ok, TUFTING! I picked a crushed velvet fabric, they had sooooo many pretty prints but I'm not trying to kill myself getting it on straight plus because of the size of the headboard the fabric had to go on sideways or you would have a seam. {my fabric was 54 inches wide}
To get a nice deep tuft I threaded the needle and went up through the drilled holes, through the button and back down, next I pushed and held the button all the way down and my super awesome husband tied it off really tight with some washers on the back.
I've seen tutorials where they stapled the thread on the back, but I couldn't get my staple to hold the thread tight enough and the button wouldn't stay down deep.

See nice deep tufts :) Awww I just heart those bling buttons!

I didn't staple my fabric on until I finished tufting because you don't want the fabric too tight or else the tufts won't go deep enough.

The washers where we wrapped and tied off the thread.
Staple and staple and staple your fabric on until your hand hurts :)

I just love how glamorous it is!

Those rhinestone buttons on that crushed velvet make me so dang happy :)

I hung the headboard with a French Cleat {from any home improvement store}

See how it reached the floor?

Oh and another bonus is that I'm pretty sure I sleep better on my glam bed :)
Thank you to Jen, Courtney, and Laryssa for inviting me over!
Aren't you just absolutely in love and dying over this headboard? I was...and still am! If I could marry a headboard, this might just be my soulmate, and I wouldn't have to buy a ring since it already has bling!
Thank you Megan for sharing this with us. You are super talented!
-Jen
Wow, that is gorgeous! Great choice on the crushed fabric - so plush-looking. Love this project and your whole bedroom!
ReplyDelete